

In general I’m very happy with the output quality of my film scans on my Epson V750.
The software I use is produced by Hamrick and is called Vuescan and it does an excellent job when scanning B&W or Colour Film in Medium format or 4×5 inch large format. But this blog is not about the Veuscan software but about some issues I had with my Epson V750.
Funny enough I only noticed this problem when I started home developing Colour film (Kodak Portra 400). So I started searching the internet and found lot’s of complaints about so called banding.
Next step was to analyse my own scanning procedure and I came to the conclusion that I have this “banding” problem as well but only in certain cases.
First lets have a look at a scanned medium format (120) image from Kodak Portra 400 film to see what we are talking about.
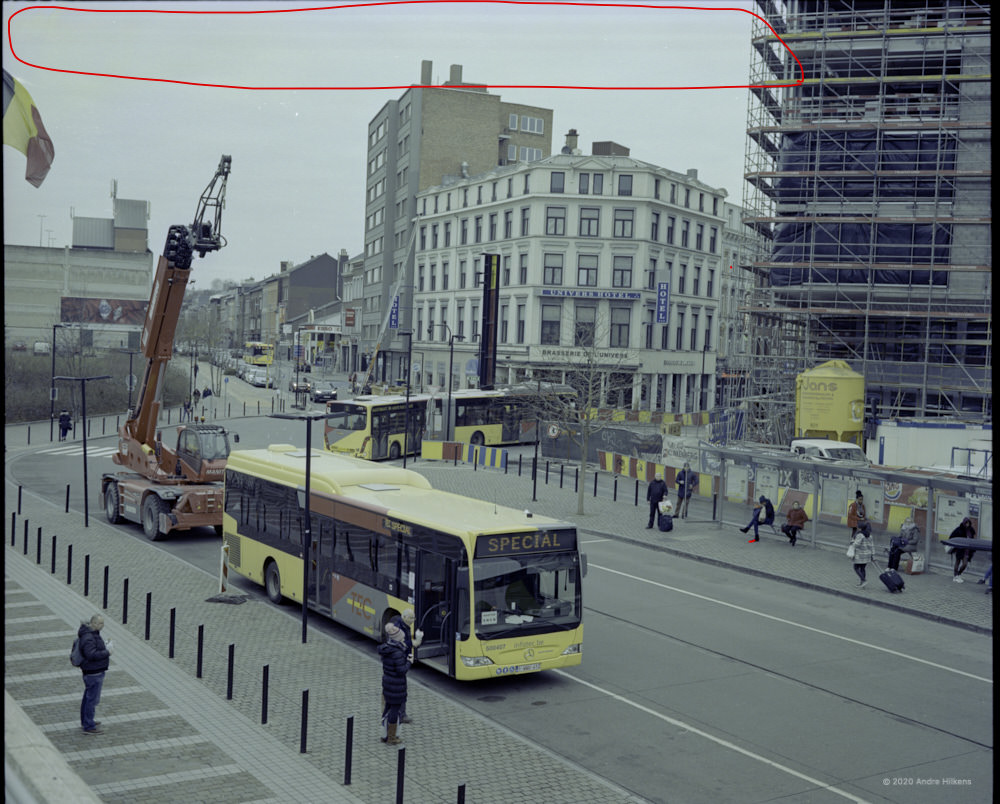
V750 Scanner banding
In the above image I clearly marked the area where there is the actual problem. Note that this banding will ONLY be visible in areas like sky or very light (maybe overexposed) areas when they are close to the negative (clear) border. These light areas show up as dark areas on your negative obviously.
Also note that the banding will only be visible, B&W and Colour negatives , when they are placed in the right hand side film strip of the film holder. The Epson V750 medium format film holder can hold 2 film strips at the same time making scanning larger amounts of film very handy. The new Epson V800 or V850 have 1 slot only which is exactly in the middle. Maybe this is done on purpose to make sure this banding does not become visible. Possibly the inner life of the new V850 is more or less the same as the older Epson V750 I have. Who knows. Anyway, let’s stay focused.
Addtionaly it will also be visible when the negative border (which is clear) is not fully covered by the film holder. So if you move your negative to the right as much as possible, making sure the film borders are fully covered on the right hand side , the banding should be much less or maybe even invisible. See image 2.
This is the most simple solution and will eliminate the banding issue in most cases. It helped a lot in my case but still not 100%. And if you shoot expensive medium format film you want the best quality. Right?

The film negative has now been moved so that the clear borders are being covered by the film holder. The banding is almost completely gone but 1 line is still visible.
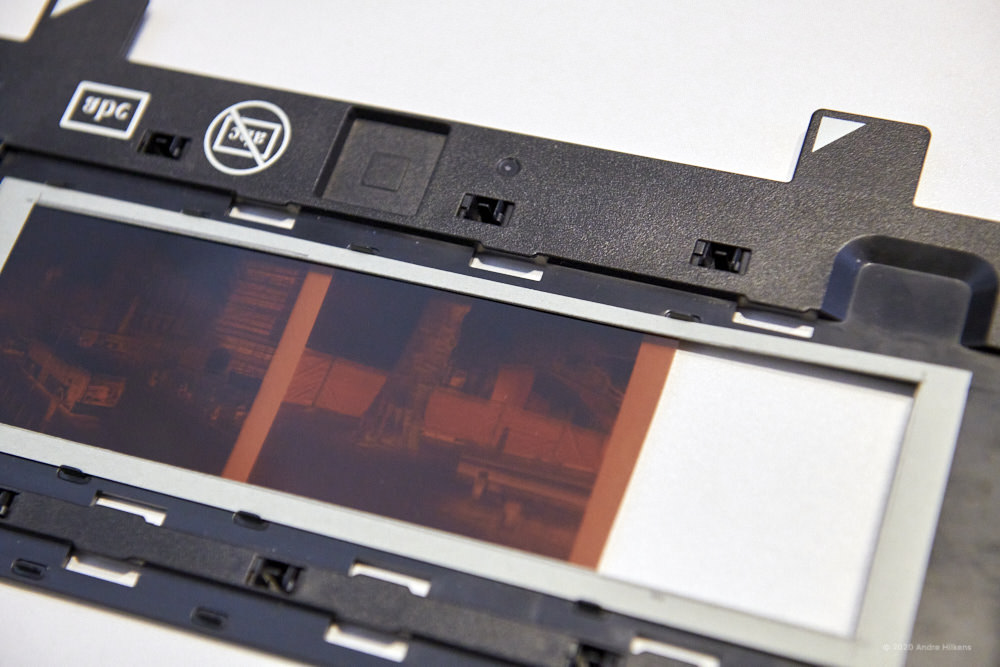
Epson V750 film holder with paper mask
Another easy solution is shown in image 3. Here I cut a mask from thick paper and placed it on top of the filmstrip. This now makes sure no light is passing along the edges of the actual image on the negative. The borders and a small amount of the image is now covered.
Since I modified my medium format film holder I place Anti Newton glass on top of this sandwhich. So the actual order is Film holder > film > mask > glass.
See image 4 below how this sandwich looks.
The glass I used is NOT anti newton glass, but glass I cut down from an old picture frame which had both sides etched which works in the same way as anti Newton glass.
I will write my epxeriences and reasons for this glass modification in another blog.
The papermask has one downside. The actual image you will be able to scan will be slightly smaller. I leave it up to you what you prefer, bandings or a slightly smaller image.
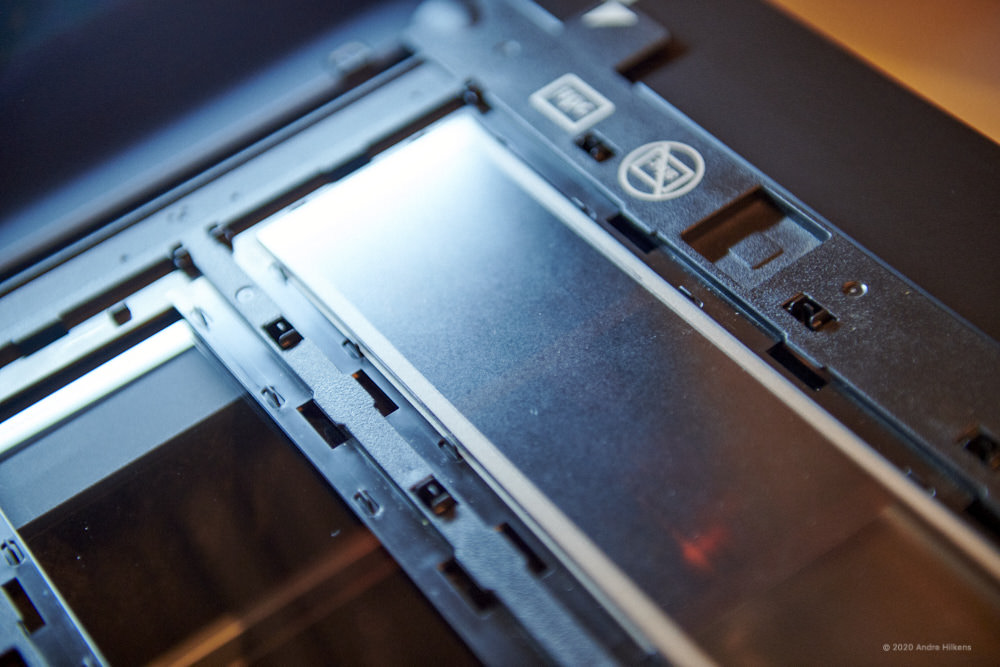
Film holder with mask and “Matt” glass installed.
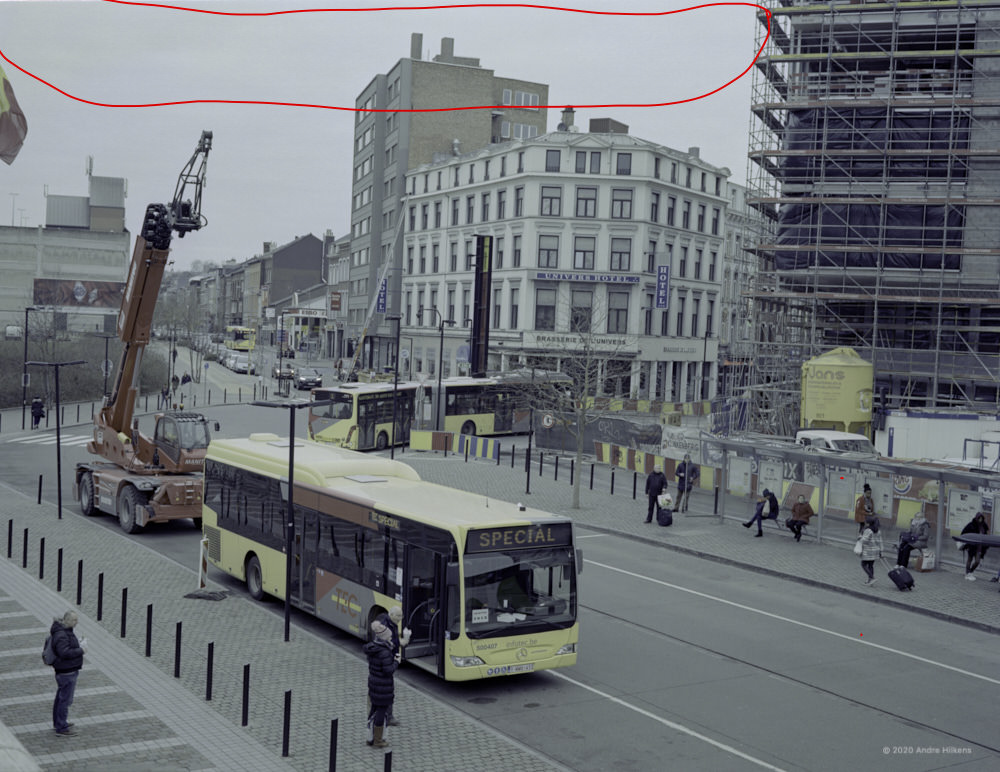
Scanned film negative but now with paper mask installed. The banding is completely gone now.
The streaks you see are from the sky and is not banding.
There you have it. Hope you liked this article which hopefull helps to sort out this issue.
Comments or other ideas to solve this banding issue are welcome since I still think this is a design flaw of Epson.